Draft on Display: How to Design a Kegerator That's as Good-Looking as It Is Functional
Draft on Display: How to Design a Kegerator That's as Good-Looking as It Is Functional
For a long time, the home kegerator was a humble beast — a repurposed mini fridge with a chrome tower jammed through the lid, living in a garage next to the lawn mower. Functional? Sure. Stylish? Not exactly.
But things have changed. Today's home brewers and draft beer enthusiasts are treating their kegerators the way they treat everything else in their homes: with intention. They want a setup that pours a perfect pint and looks like it belongs in the space. And honestly? That's not a hard goal to hit if you know where to start.
Here's your guide to building a custom kegerator that fits your kitchen, your personality, and your wallet — no compromise required.
Start With the Base: Choosing Your Fridge Foundation
Every great kegerator starts with the right refrigeration unit. You've got three main paths:
Purpose-built kegerator units come ready to tap right out of the box. Brands like EdgeStar, Kegco, and Danby make solid options that include the tower, tap, and CO2 hookups. These are great if you want minimal DIY work and a clean, consistent look from day one.
Converted mini fridges are the budget-conscious DIYer's best friend. You grab a standard 4.4 to 7 cubic foot mini fridge, cut a hole in the top or door, and build your draft system around it. More labor, more customization, lower upfront cost.
Full-size refrigerator conversions are for the serious hobbyist who wants to run multiple taps. A standard full-size fridge — especially a chest-style unit — can house two to four kegs comfortably and gives you a ton of room to get creative with the exterior.
Think about where this thing is going to live before you buy. A sleek under-counter unit makes sense for a modern kitchen. A converted chest freezer wrapped in reclaimed wood? That belongs in a rustic basement bar or a farmhouse-style entertaining space.
Tower Talk: The Feature Everyone Notices First
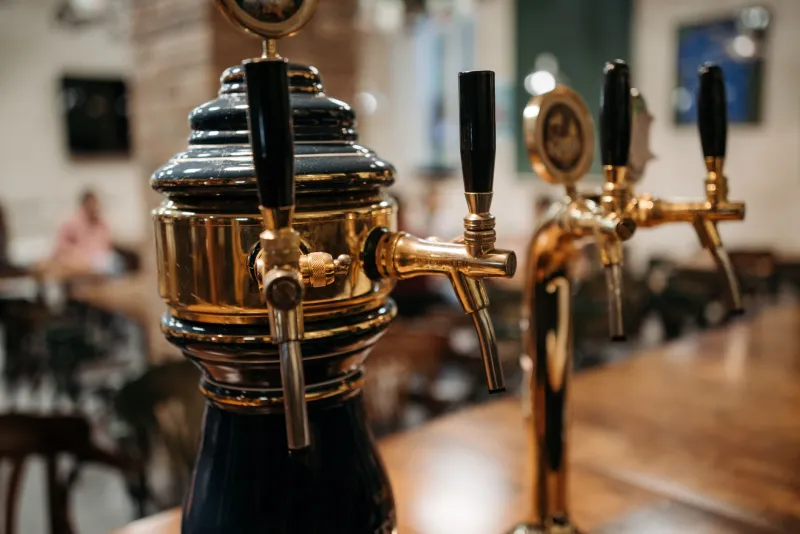
The tower is the visual anchor of any kegerator, and it's where a lot of people either win or lose the aesthetic game.
Single-tap towers are clean and classic. If you're only running one keg at a time — say, a seasonal craft ale or your own homebrew — a single chrome or brushed stainless tower keeps things simple and sharp.
Dual or triple-tap towers are for the entertainer. Having two or three beers on tap at once means your guests always have options, and it gives your setup a serious, bar-quality look that never fails to impress.
Flat-mount or through-door taps are a popular alternative to traditional towers. Instead of a column rising from the top, the faucet mounts directly through the door. This works especially well in tight spaces or for a more minimalist look.
Finish matters more than people realize. Chrome is timeless and easy to clean. Matte black is trending hard right now and looks incredible in modern or industrial kitchens. Brushed nickel pairs beautifully with stainless appliances. Pick a finish that echoes what's already in your space.
Faucet Finishes and Handle Personality
If the tower is the anchor, the faucet and tap handle are the personality. This is honestly one of the most fun parts of the build.
Standard faucets are perfectly functional, but swapping in a forward-sealing faucet (like a Perlick or Intertap) eliminates sticky residue and extends the life of the seal — a small upgrade that makes a real difference over time.
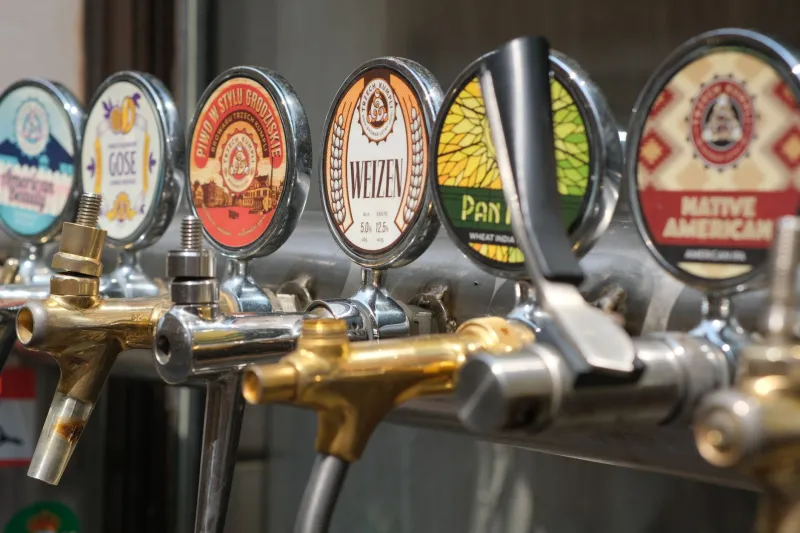
Tap handles are where you get to have some fun. Custom engraved wooden handles give a craft brewery feel. Novelty handles shaped like guitars, skulls, or sports team logos are a conversation starter. Minimalist stainless handles fit right into a clean, modern kitchen. You can even commission custom handles from small makers on Etsy if you want something truly one-of-a-kind.
Insulation and Temperature: The Unsexy Stuff That Really Matters
Here's where a lot of DIY builds fall short. Temperature consistency is everything when it comes to draft beer quality, and it starts with proper insulation.
If you're converting a fridge or chest freezer, adding foam insulation to the interior walls (beyond what's already there) helps maintain a steady 34–38°F — the sweet spot for most draft beers. A quality Johnson Controls or Inkbird temperature controller is a must for chest freezer conversions, since standard freezer thermostats run way too cold for beer.
Don't skip the door seal check, either. A worn gasket lets cold air escape and makes your compressor work overtime. Replacing it is cheap and easy, and it'll save you money on electricity over time.
Budget Breakdowns: What You Can Build at Every Level
Let's talk dollars, because that's what usually drives the decision.
Under $400 — The Scrappy Build A used mini fridge ($50–$100 from Facebook Marketplace), a basic tower kit ($80–$120), a CO2 setup with a 5 lb tank and dual-gauge regulator ($80–$100), and a standard faucet. You'll pour a solid pint, and the whole thing can live in a dorm room or apartment without taking up much space. Style points are limited, but it gets the job done.
$400–$900 — The Weekend Warrior This is where most enthusiasts land. A purpose-built kegerator from a reputable brand gives you a solid foundation, and you can upgrade the tap handle, swap the faucet for a Perlick, and add a drip tray that actually fits your aesthetic. You've got a real setup here — one you wouldn't be embarrassed to show off at a party.
$900–$2,500+ — The Statement Piece This is the build people take photos of. A dual-tap tower in matte black, a custom wood panel exterior to match your cabinetry, engraved tap handles, a tower cooling fan to eliminate foam, and a high-end CO2 system with a dual-body regulator for running two different gas pressures. At this level, your kegerator isn't just an appliance — it's a feature of the room.
Exterior Customization: Making It Yours
This is the part that separates a kegerator from your kegerator.
Wrapping the exterior is one of the easiest and most dramatic upgrades you can make. Vinyl wraps in wood grain, brushed metal, or custom prints are affordable and reversible. If you're handy, building a wood frame surround — think shiplap, barnwood, or painted MDF — can make a freestanding unit look like built-in cabinetry.
Lighting is another underrated touch. LED strip lights underneath the unit or behind a frosted glass panel in the door add a bar-quality glow without a lot of work or expense.
And don't forget the chalkboard. A small chalkboard panel on the side or front of the unit — listing what's on tap, the ABV, and a tasting note or two — is a classic move that never gets old.
The Bottom Line
A kegerator is one of those purchases that pays for itself in both utility and enjoyment over time. But when you put a little thought into the design — the finish, the handles, the exterior, the placement — it becomes something more than just a way to keep beer cold. It becomes part of how you entertain, how you show off your taste, and honestly, how you tell people a little something about who you are.
So whether you're converting a thrift store mini fridge or going all-in on a custom built-in setup, the best kegerator is the one that makes you proud every time you pull a pint. Start where you are, build what you love, and keep it cold.
Ready to start your build? Browse kegerator towers, faucets, CO2 systems, and accessories at KegoMall.com — everything you need to make it happen, all in one place.