Draft Beer at Home: Your Complete Kegerator Setup Guide from First Pour to Last Drop
There's something genuinely satisfying about walking to your own fridge, pulling a perfectly chilled pint, and watching a clean, creamy head settle into the glass. No trips to the liquor store. No recycling towers of empty bottles. Just bar-quality draft beer, on demand, in your own kitchen or garage. Sound too good to be true? It's not — and this weekend, you could have it.
Building a home kegerator is one of the most rewarding projects a craft beer fan can tackle. It's part DIY challenge, part long-term investment, and entirely worth it. Here's how to get started.
Step 1: Decide Between a Dedicated Kegerator or a DIY Conversion
Your first decision is whether to buy a purpose-built kegerator unit or convert a spare refrigerator you already own.
Dedicated kegerators come pre-drilled with tower mounts, include a basic tap setup, and are sized specifically to hold one or two standard kegs. They're cleaner-looking, easier to set up, and a great option if you want something that's ready to go right out of the box. Entry-level models typically run between $300 and $600, while premium units with dual taps or stainless finishes can push past $1,000.
DIY kegerator conversions use a chest freezer or an old upright fridge and a kegerator conversion kit. This route can cost as little as $150 to $250 in parts if you already have the fridge, making it significantly cheaper upfront. The tradeoff is a bit more elbow grease — you'll need to drill a hole for the tap tower, set up the CO2 lines yourself, and dial in the temperature manually.
For most beginners, a dedicated unit is the smoother path. But if you're the kind of person who loves a good weekend project, the conversion route is genuinely fun.
Step 2: Choose the Right CO2 Tank and Regulator
Your kegerator needs CO2 to push beer from the keg to your glass. Getting the sizing right matters more than people realize.
For a standard single-keg home setup, a 5 lb CO2 tank is the sweet spot. It's compact enough to fit inside most kegerator cabinets, yet holds enough gas to push through two to four half-barrel kegs before needing a refill. If you plan to run multiple taps or entertain frequently, step up to a 10 lb tank.
Your regulator attaches to the CO2 tank and controls the pressure delivered to the keg. A good dual-gauge regulator lets you monitor both the tank pressure and the serving pressure simultaneously — don't skip this, it's worth the extra few dollars. For most American lagers and ales, you'll want to dial in serving pressure between 10 and 14 PSI. Higher-carbonation beers like hefeweizens may need a nudge toward 15–16 PSI.
Step 3: Pick the Right Keg Coupler
This is the piece most first-timers overlook — and it's critical. Not every keg uses the same valve, which means not every coupler fits every brand.
Here's a quick cheat sheet for common US beers:
- D System (American Sankey): Budweiser, Coors, Miller, most domestic craft beers
- S System (European Sankey): Heineken, Stella Artois, Guinness (some)
- G System: Bass Ale, Harp
- A System: Warsteiner, Paulaner, many German imports
If you're primarily drinking American craft beer, a D System coupler will cover the vast majority of what you'll buy. If you love rotating international taps, consider keeping a secondary coupler on hand.
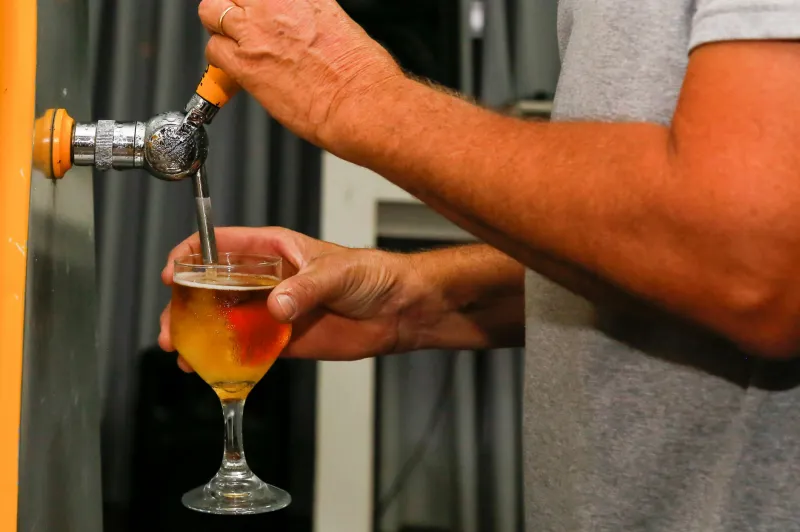
Step 4: Get Your Lines and Tower Ready
Beer line length and diameter affect how your pour looks and tastes. Standard 3/16-inch inner diameter vinyl tubing is the go-to for most home setups. Aim for 5 to 6 feet of line between the keg and the faucet — shorter lines can cause excessive foaming because the beer doesn't have enough resistance to slow it down before hitting the tap.
If you're using a tower-style kegerator, make sure your tower is insulated or runs cool air through it. Warm towers are a leading cause of foamy pours, especially in summer.
Step 5: Set the Temperature and Let It Settle
Set your kegerator between 34°F and 38°F. This is the sweet spot for most domestic and craft beers. Once you connect a new keg, give it at least 24 hours to settle before pulling your first pour. A freshly tapped, jostled keg is a foamy keg — patience pays off here.
Troubleshooting Common Problems
Foamy pours? Check your serving pressure, line length, and temperature. Nine times out of ten, one of these three is off.
Flat beer? Your CO2 pressure may be too low, or you might have a leak somewhere in the line. Apply soapy water to all connections and look for bubbles.
Off flavors? Clean your lines. Beer lines should be flushed every two to four weeks. Neglecting this is the number one cause of that funky, stale taste.
The Cost Breakdown: Is It Actually Worth It?
Let's talk numbers. A half-barrel keg (15.5 gallons, roughly 165 twelve-ounce servings) of a popular craft beer typically runs $150 to $200 at KegoMall. That works out to about $0.90 to $1.20 per serving. Compare that to buying craft six-packs at $10 to $12 each — you're looking at $1.67 to $2.00 per can.
On a modest setup that costs $400 to $600 all-in, most regular beer drinkers break even within six to twelve months. After that, every keg is straight savings.
Your Weekend Project Awaits
A home kegerator isn't just a appliance — it's a statement. It says you take your beer seriously, you love hosting, and you're not afraid to invest in a setup that genuinely improves your everyday life. Start with a single-tap unit, get comfortable with one keg style, and expand from there. Before long, you'll be the friend everyone wants to visit on a Friday night.
Ready to get started? Browse kegerators, CO2 tanks, couplers, and conversion kits at KegoMall — everything you need to build your dream draft setup is already waiting for you.